
Managing a refund in QuickBooks needs proper knowledge on how to record a refund in QuickBooks online. If you are a small business owner, you need to know how to record a refund in QuickBooks from vendors online. QuickBooks is the online software that provides the feature to record these refunds.
If you want to know how to record a refund on the QuickBooks desktop, then the first thing you must know is the vendor refunds and customer’s refunds. These are the refunds you need to record in your QuickBooks online payment software. This post explains how to record a refund in QuickBooks online as a beginner.
How To Record A Refund In QuickBooks Online From A Vendor?
QuickBooks gives the facility to record a refund from vendors online. Many small and medium-sized business owners can use this feature. However, you can record a refund in QuickBooks from vendors in various processes. Follow the step-by-step process to know how to record a refund in QuickBooks online from a vendor.
Method 1: When A Vendor Sends You A Refund Check In QuickBooks For Returned Inventory Items
To record a refund in QuickBooks of the vendor refund check, follow the process below:
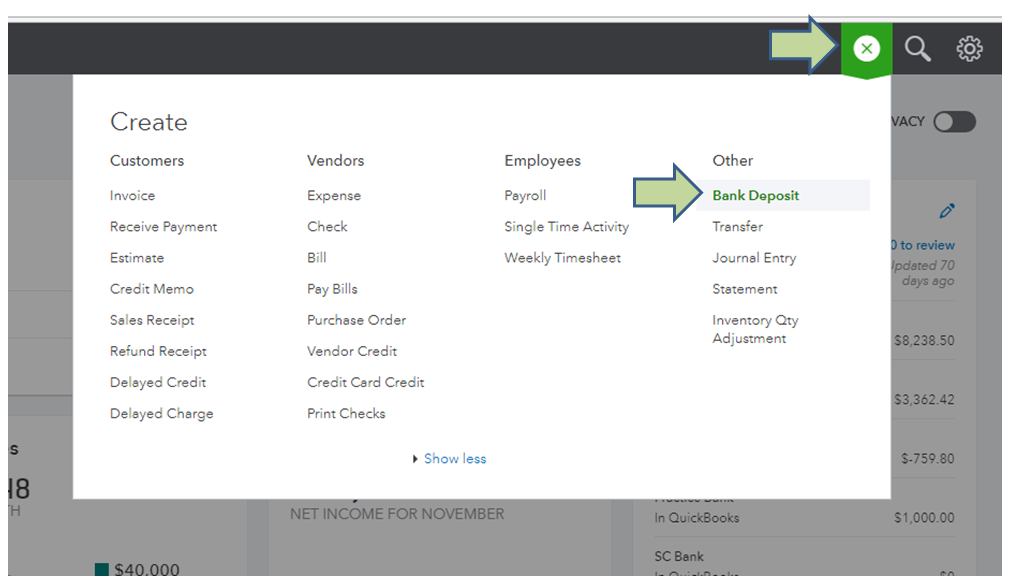
- First of all, go to the Banking menu, then select the Make deposits option.
- Next, click on the OK button in the deposit window.
- Click on the Received from the dropdown menu. After that, select the Vendor who sent you the refund check.
- You will see the dropdown menu with an Account option. Now, select the appropriate Account Payable Account from the list.
- Enter the amount of the Vendor check in the amount column.
- Now, enter the required information in the Deposit account.
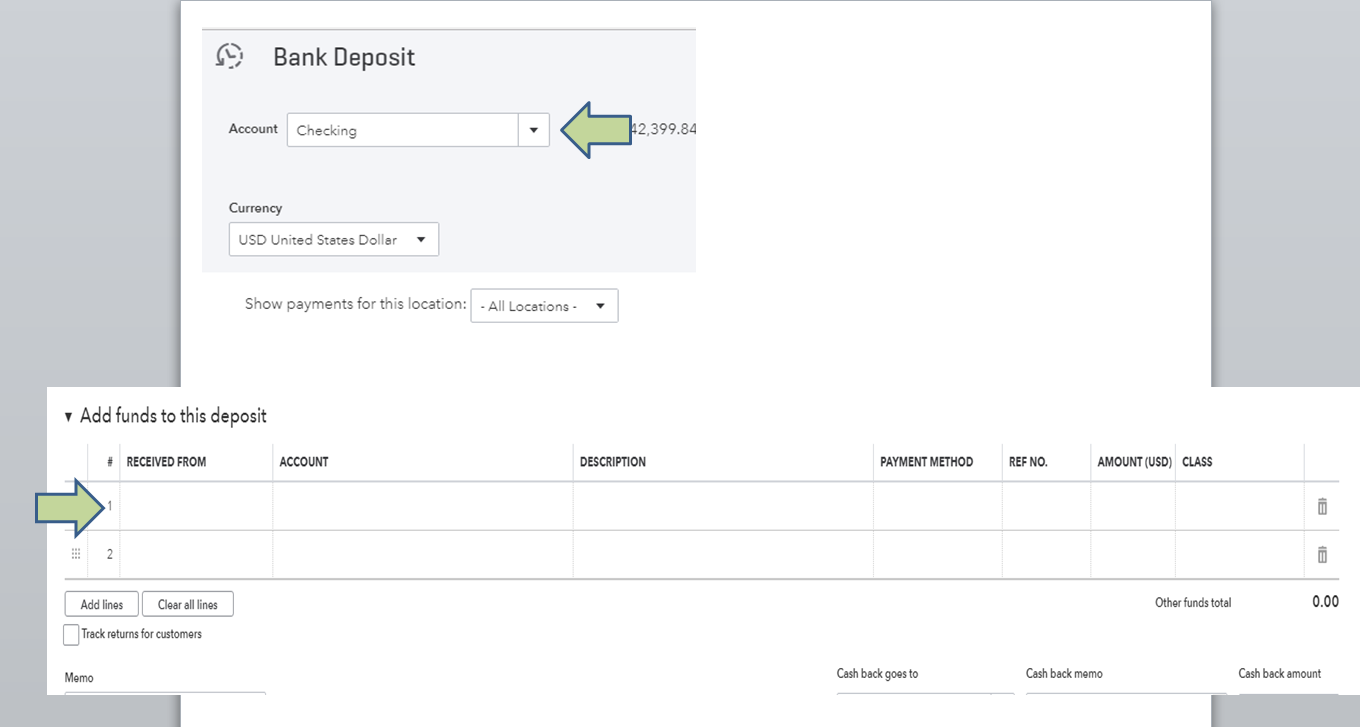
- In the last step, select the Save and Close option.
To record a bill credit for the returned items in QuickBooks online, follow the process below:
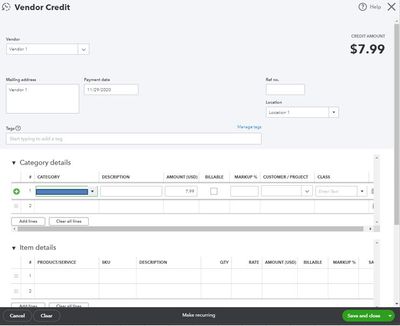
- First, select Enter bills from the Vendors menu.
- In the next step, select the Credit button to account for the return of goods.
- In this step, enter the Vendor name on the required column.
- Select the Items to tab from the menu, and enter the Accounts on the original bill.
- Enter the appropriate amount for each Account in the Amount column,
- Finally, click on the Save and Close button.
Read More:- How To Manage QuickBooks Accounts Receivable On Desktop?
To link a vendor refund to the bill credit, follow the process below:
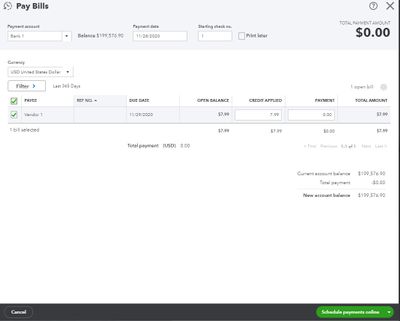
- First of all, Go to the Vendors menu, then select the Pay bills option.
- Verify all the Refunds in the list that matches the Vendor check amount.
- Now, choose the Set credits and apply for the Bill credit. After that, click on the Done button.
- Tap on the Pay Selected bills and click on the Done button in this step.
Method 2: When A Vendor Sends You A Refund, Check-In QuickBooks For Paid Bill
To record a deposit of the vendor refund check, follow the process below:
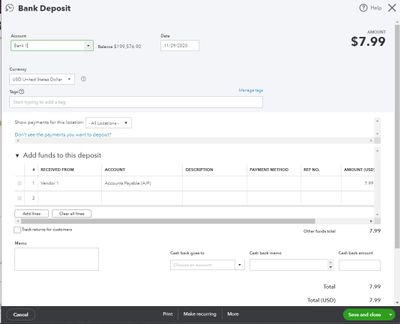
- First of all, select the Make Deposits option from the banking menu.
- Next, click on the Received from the dropdown menu in the Make Deposits window. Now, choose the Vendor from the list who sent you the Refund.
- Select the Payable Account from the appropriate accounts. You will see this option in the Account dropdown menu.
- Now, fill the Refund amount of the vendor check in the account column.
- In the end, click on Save and Close option.
To record a bill credit for the vendor refund amount, follow the process below:
- Select the Enter bills option by navigating to the Vendor’s menu in the first step.
- After that, select the Credit option button for the refunded items.
- In this step, enter the Vendor name and click on the Expenses tab option.
- Now, enter the Accounts on the original bills of the Vendor.
- Enter the appropriate refund amount for each Account after going to the Amount column.
- Click on the Save to end the process.
To link the refund deposit to the bill credit, follow the process below:
- Firstly, go to the Vendor’s menu and select the Pay bills option.
- Review and Verify the refund deposit in the column that matches the vendor check account.
- Select the Set credits option, apply for the Bill credit you created earlier, and click on the Done button.
- Click on the Pay selected bills, and click on Done to end the process.
How Long Does It Take The Enterprises To Refund Deposits?
If you return the items to an enterprise, you want to know how long does it take enterprise to refund deposits. An Enterprise takes approximately 5-10 business days to refund deposits to your bank account. Once you request a refund from an enterprise after returning the items, you can receive your refund deposits within the next ten business days.
To receive a refund from an enterprise, follow the simple process:
- Connect with the Customer service department of an enterprise to request your refund deposits.
- Fill out the refund form with the details of return items in the required fields. Answer questions of the enterprise department regarding refund items.
- Once the enterprise confirms your refund deposits, wait for the next 5-10 business days to receive the refund amount.
How To Record A Refund In QuickBooks Online On A Credit Card?
Many small business owners don’t know how to record a refund in QuickBooks online on a credit card. There are situations in which you pay a vendor with a credit card; you need to record the credit card refund amount in your QuickBooks Online. Follow this simple process to understand how to record a refund in QuickBooks on a credit card.
To record a credit card refund in QuickBooks online, follow the process below:
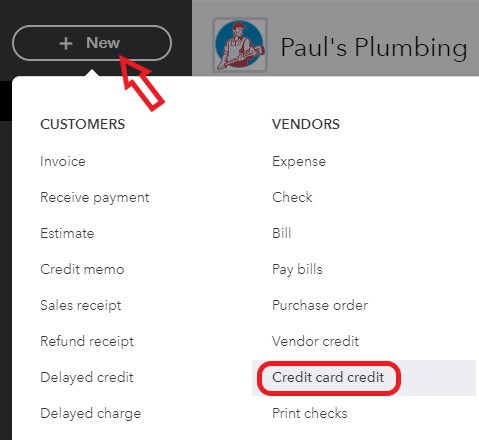
- At the left top menu bar, click on the New button.
- In the next step, select a Credit card in the Vendors column.
- Now, fill out the Credit card transaction details in the required fields.
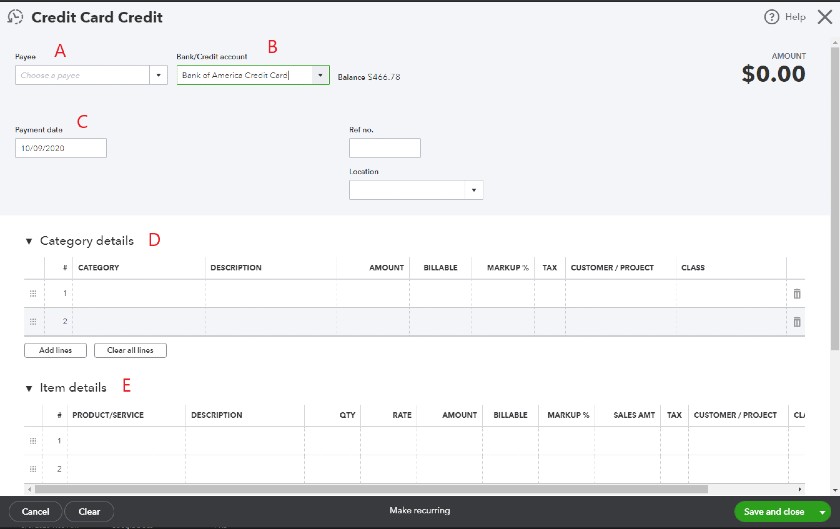
- In the end, click Save and Close.
Conclusion
This guide explains how to record a refund in QuickBooks online beginner-friendly way. You can record a refund in QuickBooks in different ways; the process to record a refund is quite simple. You can follow the process shown above on how to record a refund in QuickBooks from a vendor online. If you face any problems while recording refunds, you can call our experts to resolve the issues.
Wire IT Solutions offers expert advice to small businesses in managing accounts, bookkeeping, and financial services. We provide professional support in various accounting software. For any assistance in accounting, bookkeeping, and financial services, visit our website.
